Virtual Lab 2 | Setting up NGINX and Cypress

Automation is becoming increasingly important in software development, and it's easy to see why. By automating repetitive tasks, developers can save time and reduce the risk of human error. One tool that has become very popular in recent years is Cypress. Cypress is a powerful testing framework that allows developers to write automated tests for their web applications.
To continue in our series to create a Virtual Automation Lab, we'll see how to use Cypress and Docker together to create a powerful testing environment that can help you build better software.
Step 1: Run a NGINX container with the website to test.
The first step in setting up our Cypress and Docker testing environment is to create a web server that we can use to test our scripts. For this purpose, we'll use NGINX. NGINX is a lightweight, high-performance web server that is perfect for our needs.
To get started, we'll need to create a Docker image that runs NGINX and has a folder with a simple static website to test. Just a reminder, we are running Docker using WSL.
- Assuming our website is under a folder called static-html
- Open a terminal window on your computer.
- Run WSL to access our WSL instance with Docker.
- Inside
/path/to/static-htmlfolder, create a new Dockerfile with the following:
    FROM nginx
    COPY static-html /usr/share/nginx/html
- Type the following command to download the NGINX Docker image:
docker pull nginx
- Once the image has been downloaded, type the following command to create an image, based on the instructions in our Dockerfile:
docker build -t web-image .
- Create a new container based on our web-image
docker container create --name web-server -p 8080:80 web-image
- Start the web server container:
docker start web-server
- Verify our docker container is running, and access localhost:8080 to see our amazing e-commerce website!
The command docker build -t web-image . created a new image, following the instructions of the Dockerfile in the current directory.
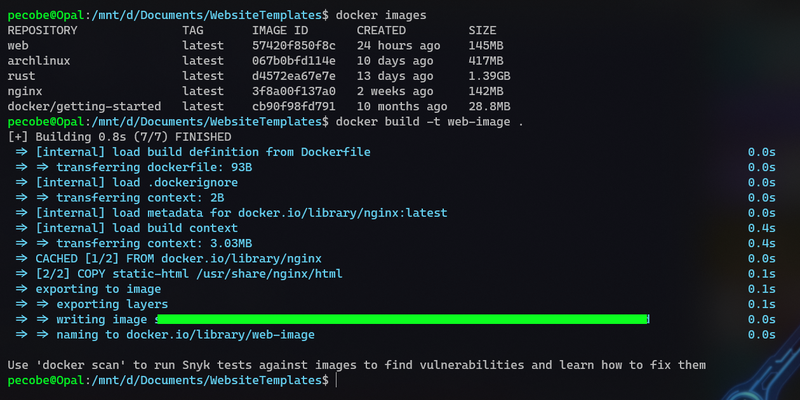
With docker container we create a new Docker container named "web-server" that runs the web image, based on the NGINX image web server. The "-p" option tells Docker to maps port 80 on the container to port 8080 on your computer. We then run the container using docker start web-server command.

Once the container is running, you can access the NGINX web server by opening a web browser and navigating to "http://localhost:8080". If everything worked correctly, you should see the site from our static-html folder.

Step 2: Using a Clean Cypress project, create a script to access the NGINX server and validate the title.
Now that we have our NGINX web server up and running, we can start writing Cypress scripts to test it. The first thing we'll do is create a new Cypress project and write a script that accesses the NGINX server and validates the title of the page. We will reuse our Cypress project that we created in a previous post.
Here's how to do it:
- Open a new terminal window.
- Navigate to our Cypress project and start Cypress:
npx cypress open
-
This will open the Cypress Test Runner. Choose E2E and a Browser.
-
Click New spec, and choose Create new spec.
-
Open the Cypress project in an IDE, in my case I'm using VSCode.
-
Locate our new spec file.
-
In our new "spec.js" file, add the following code:
describe('Web Server', () => {
  it('should have the correct title', () => {
    cy.visit('http://localhost:8080')
    cy.title().should('eq', 'GemStone - Free HTML CSS Template by TemplatesJungle.com')
  })
})
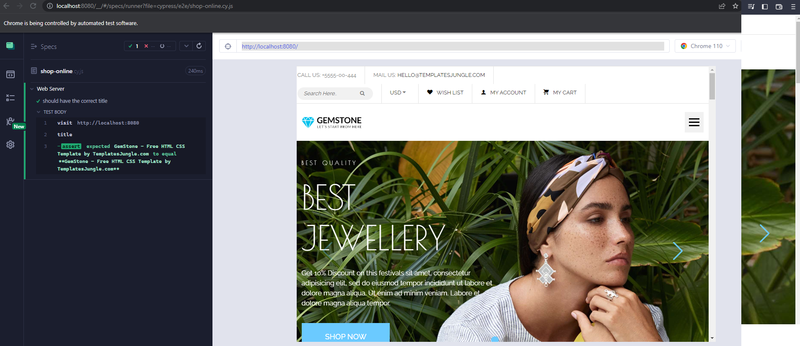
This script uses the "cy.visit" command to navigate to our web server and the "cy.title" command to retrieve the title of the page. We then use the "should" command to validate that the title is correct.
-
Save the "spec.js" file and return to the Cypress Test Runner.
-
Click on the "spec.js" file to run the test.
If everything worked correctly, you should see the test pass in the Cypress Test Runner.
Step 3: Run our local Cypress scripts using the Cypress container.
Now that we have our test script working locally, we can create a Docker container that will run Cypress and execute our script. Here's how to do it
-
Open a new terminal window.
-
Navigate to your Cypress project directory and open WSL:
cd /path/to/your/cypress/project
wsl
- Run the following command to start a new Docker container and run the tests:
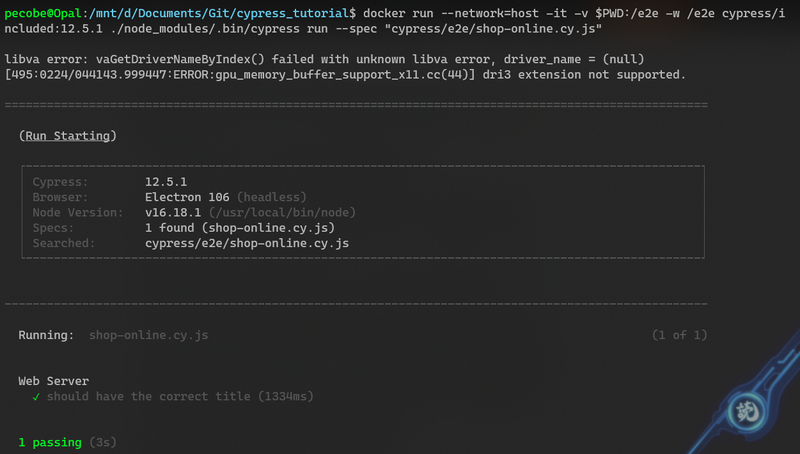
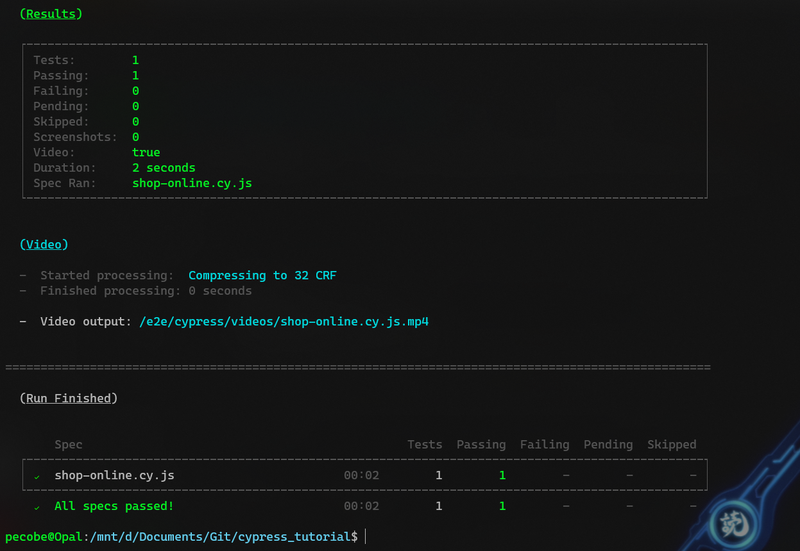
docker run --network=host -it -v $PWD:/e2e -w /e2e cypress/included:12.5.1 ./node_modules/.bin/cypress run --spec "cypress/e2e/shop-online.cy.js"
This command will start a new Docker container based on the cypress/included image and using the --network=host flag, so the container can reference localhost or 127.0.0.1 directly, mount your project directory as a volume inside the container, set the working directory to the cypress/e2e directory (where our Cypress tests are located), and run the cypress run command with the --spec flag pointing to our test file.
- Wait for the container to start up and run your tests. You should see the output of the test runner in your terminal window.
Conclusion
And that's it! We've successfully set up a testing environment using Cypress and Docker that can be used to test our web applications quickly and easily. By automating our testing process, we can save time and reduce the risk of human error, allowing us to build better software faster.
In the next post of this series, we'll take a deeper dive into Cypress and explore how to run Cypress in interactive mode, as well as how to create more complex test cases for our website. Stay tuned for more!